We get asked quite a bit about LED wiring for our RGB speakers that we sell, so we figured it would be beneficial for our customers that we go over the installation process in a help article.
RGB LEDs are pretty simple, and all of ours share the same basic traits:
Common 12 volt wire - The black wire (strange, we know) is the positive wire for the LED strips.
Red, Green, and Blue wires are the grounds for the LED that is the same color as the wire.
So, if you're not using a controller and just want to chose which color the speakers stay constantly, you just have to ground the corresponding wire or wires.
If you want red, ground the red wire.
If you want green, ground the green wire.
If you want blue, ground the blue wire.
You can get yellow by grounding the green and the red wires.
You can get purple by grounding the blue and red wires.
You can get a cyan color using the green and the blue wires.
White is achieved by grounding all three grounds.
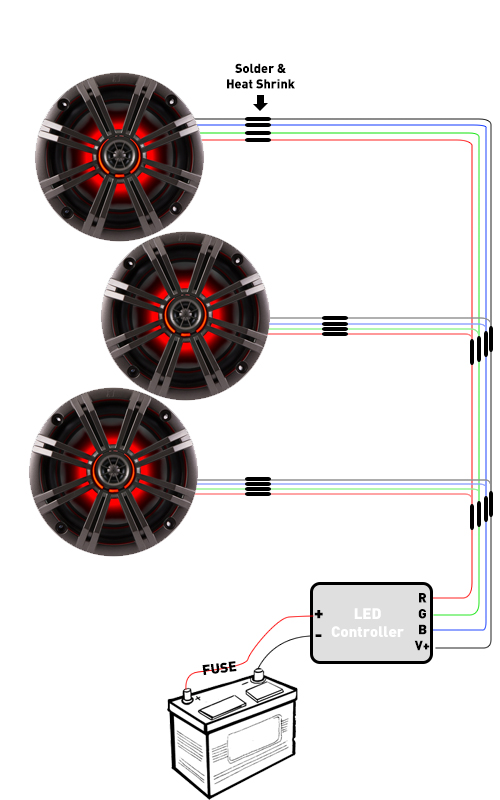
When using a controller, you simply need to wire the LEDs to the corresponding color wire from the controller like the Kicker KMLC, and supply the controller with 12 volts and ground.
Wiring multiple speakers to the same controller
With many of our our speakers, the speaker itself will have a plug on the LED wiring, however when performing our own installations we remove that plug and solder directly to the wire, or use waterproof butt splices.
The diagram below shows how to properly wire LED speakers in parallel.

